Okay, we admit it, the word “secret” is a bit misleading. In truth, successful sod installation mainly involves a little knowledge about how grass grows, combined with a good deal of common sense.
Unfortunately, despite having this knowledge, many companies often take shortcuts when installing turf. These shortcuts often weaken, or even kill the sod, leading to disgruntled customers. As much as possible, all installation steps should be followed closely so that the new grass has the opportunity to fulfill its purpose.
Novogreen Césped Natural recommends the following:
GENERAL CONCEPTS
Unlike seeds, which only have two windows that are ideal for germination, sod can be placed in any season. “If our harvester can extract it when the ground is not frozen, the customer can place it. Of course, it will not take root as quickly or deeply during the cold months, but the sod will survive. In fact, if after around October 15 you have to work a grass surface and you do not want to work in mud, sod is the only option.”
Sod is usually harvested and sold mainly in three formats – standard roll (0.4m x 2.5m), Big Roll (0.75m x 20m) and Maxi Big or Magnum Roll (1.2m x 16m.).
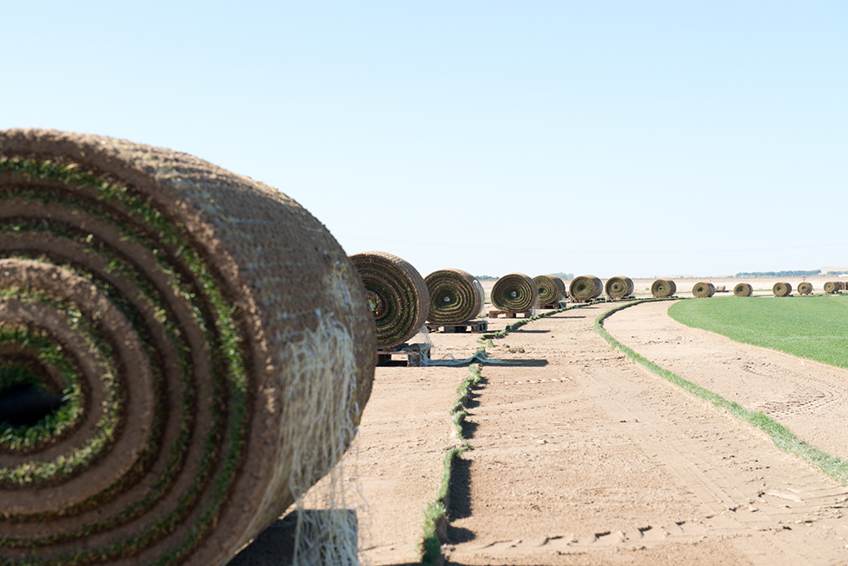
Magnum Roll sod
When the turf is harvested, the vast majority of the roots are cut. I would say this happens to roughly 80-90% of the roots, but it depends on whether a thick-cut or thin-cut surface is requested. The blade of the harvesting machine can be adjusted so that the grass is so thick that it can’t be collected. We know that ideal surface functioning requires thin-cut grass, since a thick-cut one will have greater trouble establishing roots and reaching the necessary depth in the new ground. Very few people prepare the new ground as they should, often only laying the turf on the compacted soil, which is hard as a rock. This makes it difficult for the grass to take root. Therefore, when you lay down a thin-cut sod, it will tend to stay within itself. The roots will not make headway on the hard ground, because they simply can’t.
The thin-cut sod (around 15 mm) has less self-sufficient habitat to live in, meaning it has to look for a new surface farther below in order to survive.
SELECT A VARIETY

Novogreen silica substrate
This is one of the most important decisions that must be made, since it will determine long-term success or failure. The first step is to determine if you are in an area of cold weather, warm weather, or transition area grass types. Once this has been determined, you must look at the rest of the conditions that may affect the development and installation of the sod (water quality and availability, physical-chemical characteristics of the terrain, specific climatology of the area, how the area will be used, etc.). Choosing the correct breed will greatly facilitate future maintenance.
Novogreen Césped Natural has 17 varieties (most of them certified) that are suitable for each particular area, as well as a technical team to help clients make the correct decisions.
GROUND PREPARATION
Start from bare ground
First of all, it is best to lay the turf down on bare ground. Good sod-soil contact is needed for the sod to develop. Sometimes, people try to place it over existing vegetation without any preparation, which virtually guarantees failure. So, if you have a grass or weed cover, the way to eliminate it is to use a non-selective herbicide.
Perform proper leveling
When working on new land, it is necessary to loosen up the ground, since this is going to be where the grass will live. Always carry out proper leveling afterwards.
Obtain a soil analysis
The next step we recommend is to send a representative soil sample that can be analyzed in a laboratory. For a small fee, many laboratories perform a good soil analysis with recommendations based on the deficiencies detected. This way, the necessary modifications and nutrients can be added to improve fertility and pH.
Decompact the Soil
Now, it’s time to decompact the soil with a rotavator, especially for the leveling process. This is a good opportunity to incorporate any modification to the first few centimeters of the ground.
If in effort is made to prepare the soil correctly, we can obtain roots in 7-10 days. Making modifications at the top will not only pay off in the set-up phase, but also in times of heat and water stress.
If we are going to install an irrigation system, it must be done after the surface has been decompacted, but before the final surface is prepared.
Level the terrain
After tilling the soil, surface residues such as rocks, large lumps, construction debris, stumps, sticks, etc., must be removed so that they do not interfere with root development and water movement. Next, perform a final leveling to smooth out the surface. Ideally, this step will be done by hand with a rake, because doing it with a tractor with implements will greatly influence the compaction of the terrain.
Afterwards, the soil should be allowed to settle for a couple of days. Irrigation or rain will help this step.
Apply a starter
Although fertilization and modifications have already been carried out, it is advisable to apply a phosphorus-rich fertilizer on the surface so that the sod has something to feed on from the moment it is installed.
Moisten the soil before installing the sod
We must moisten the ground for a few days before the sod is installed in order to create a bed for it. In many cases, however, the ground is irrigated too much, to the point that it is impractical or almost impossible to lay the grass down because the surface is muddy or slippery. There’s nothing worse than ruining a good leveling.
INSTALLATION TIPS
Install the grass immediately upon delivery
The sod should never be ordered until ground preparation has been completed, since sod should always be installed immediately after it reaches the site. The longer the sod is rolled up, the more it will deteriorate, since the natural activity of the microorganisms that live in its soil generates heat, which can’t be released when the sod is rolled up. In the middle of summer the sod heats up quickly. In autumn, winter, and spring, when the temperatures are cooler, the sod’s lifespan increases up to 2-3 days without obvious signs of heating or yellowing, but when temperatures are above 21 °C, it needs to be laid down the day it is delivered.
If it isn’t possible to install the sod right after delivery, it must be placed in a shaded area to keep it cool. Spray the sod lightly with water to keep it fresh until the moment of installation.
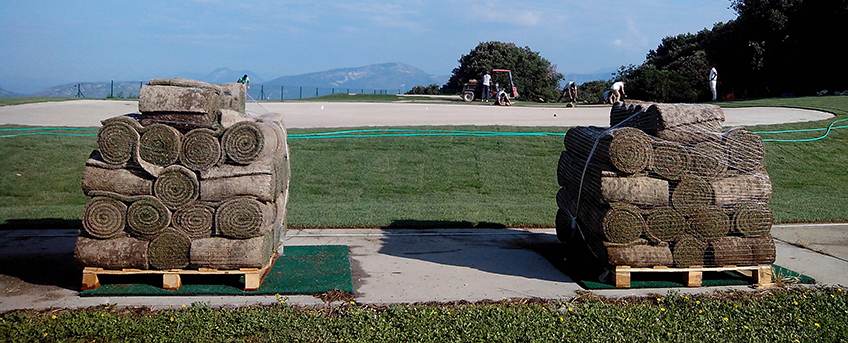
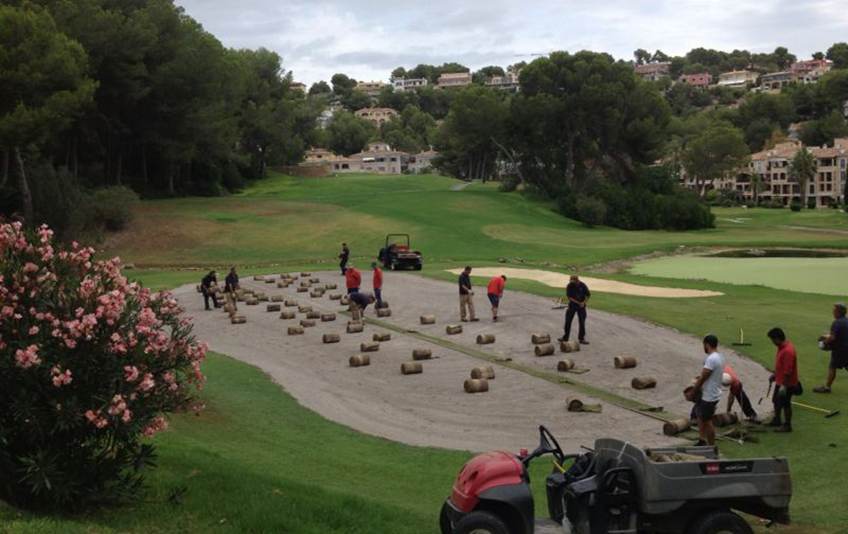
Standard sod pallets ready to be installed
Install the sod during the coolest part of the day
In summer, it’s best to start laying the sod down as early in the morning as possible, before the sun begins to heat the soil surface. If this isn’t possible, you must start cooling off the soil ahead of time so that the roots of the freshly-harvested sod aren’t placed on a “frying pan.” It’s also advisable to cool down the green part of the sod until the moment it’s laid down, even though this increases the weight of the sod roll and makes installation more difficult.
Start with a straight line
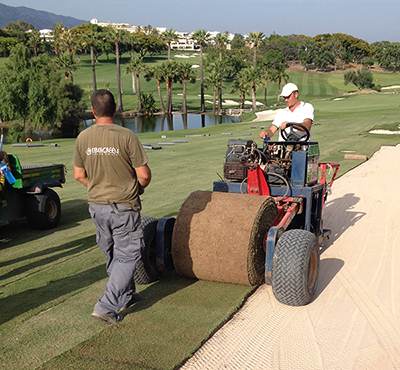
Big Roll sod installation
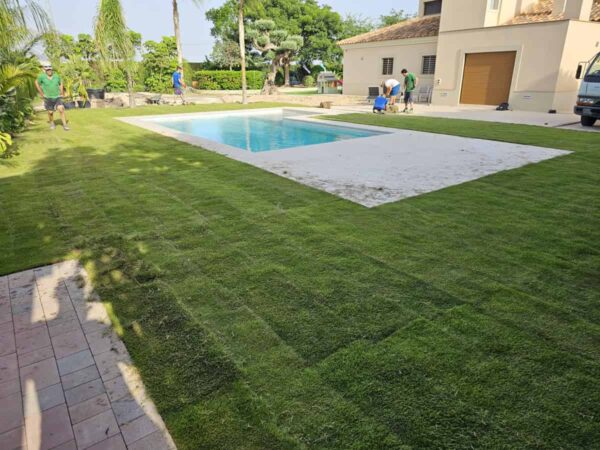
Where should grass installation start? Ideally, this decision should be made based on the longest straight line we have on the site, so that we will see fewer edges during the first week. Preferably, we will stick them together like the bricks of a house.
Fit the edges firmly together
One of the biggest mistakes that we see professionals make is allowing loose or careless seams at the edges. The soil is full of weed seeds, and if we do not place the sod over these seeds, weeds will sprout. If all the edges are tight, we reduce the possibility of the weeds sprouting.
Irrigate on the fly
Sometimes, waiting to irrigate once the entire job is finished is too late. It’s important to start irrigating a couple of hours before the heat starts to hit, since if we wait until the job is finished, the sod will most likely overheat.
Install on slopes
In many cases we wonder if it is better to place sod across the slope, or in the direction of the slope. In terms of the grass, there isn’t much difference, although it is necessary to anchor the sod to the ground in the steepest areas, with stakes, clamps, bolts, etc. In areas of extreme slope, 2-3 clamps should be placed per sod, and one in the less steep areas.
Standard roll sod installation
POST-INSTALATION
Irrigate Immediately
The most important key to successfully installing turf is the irrigation system. If a call is received from the client within two weeks after the installation because the grass does not look good, almost 100% of the cases are due to the fact that the grass was not well watered after the installation. Light irrigation should be performed so that the sod and the first cm of the soil remain wet, since at the beginning the grass only has roots in the sod and needs to root into the ground itself. It is useless to apply large amounts of water to the ground, because at the beginning the roots are not there. Frequent, light watering is more effective.
Roll
Many installers recommend rolling after installation, but this decision will depend mainly on the preparation of the terrain and leveling that has been done.
Rolling causes ground compaction, which is one of the main problems the grass faces. It’s best to level and prepare the ground well to ensure perfect sod-soil contact. This way, rolling isn’t necessary.
AFTERCARE TIPS
Irrigate
Until the sod takes root, irrigation is going to be the most important factor. You can lay the sod on the best-prepared land, but if it isn’t watered, it will die. It’s necessary to remember that most of the roots have been lost in the harvesting process. The sod has to develop new roots, and it needs our help to do this. It needs to have moist, but not muddy soil, since muddy soil will create an anaerobic environment that will choke the roots. In addition, if we have a lot of heat and the sod is swamped with water, it will overheat.
So, how much water is enough? You have to use common sense and follow the sod closely. Lift up one side of the sod and see if the turf is wet. When sod is under water stress, it changes from a healthy green color to a bluish gray.
If the ground preparation, sod installation, and watering are done correctly, in 7-10 days it should start to require less water without any problem.
Mow
Before making the first cuts, we must wait for the sod to begin to take root in the soil, but not leave it for too long, since it will continue to grow after installation. This will make the first cuts neglected and cropped, which can kill the grass. When we are going to make the first cuts, we have to decrease the amount of water provided so that a lawnmower can be used without causing damage.
Enjoy the turf!
Instant is the main word that differentiates sods from seeds. From Novogreen Césped Natural, we encourage people to sod and enjoy their facilities right away.
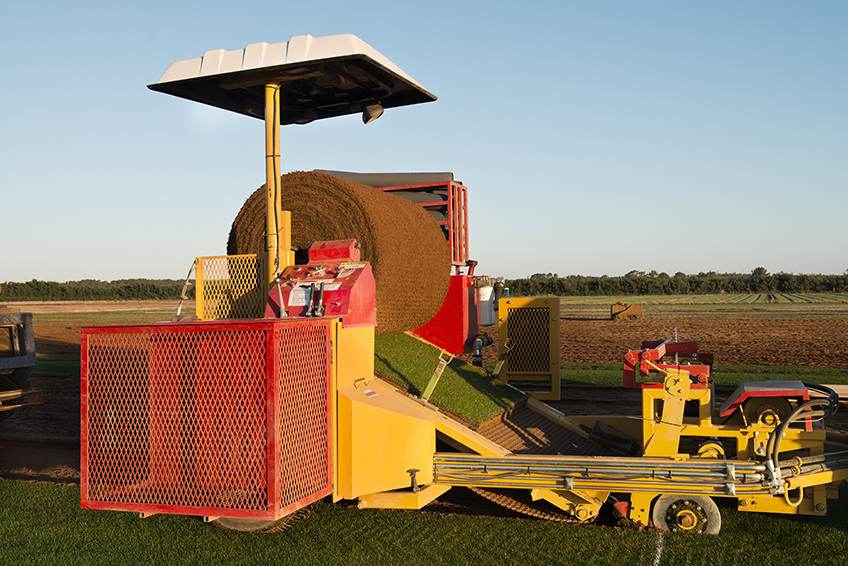
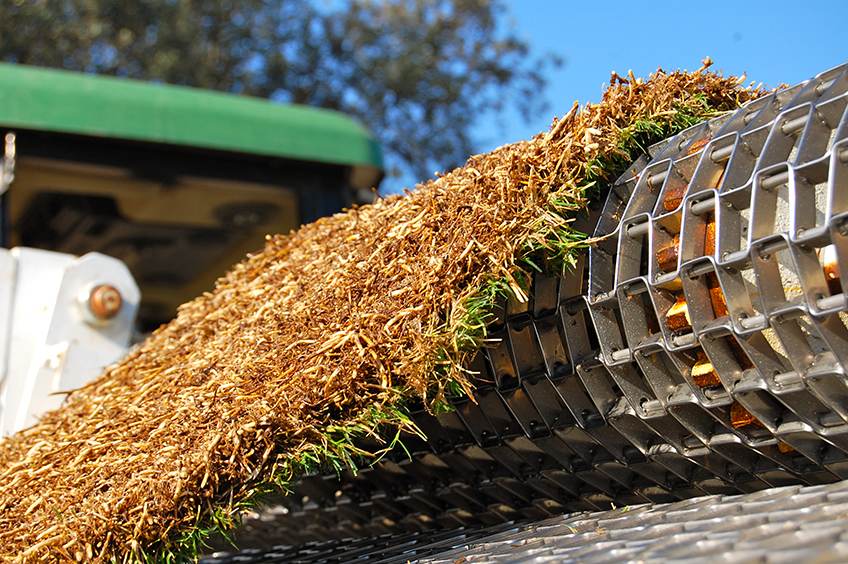
Sod harvesting machine
Jaime Linares
Manager of Novogreen